Showing posts with label Bread. Show all posts

Thursday, March 7, 2024

Cheesy Garlic Bread


If there's any bread that I can say that I'm obsessed with is Cheesy Garlic Bread

The store brought ones is so good.

But, I just found out myself that the Homemade ones is 100 times better!

It is actually not hard to make. 

I swear this is the best!


Aromatic Garlic Confit

The key to cheesy garlic bread is the garlic confit. Oven-roasted with herbs for a delectable fragrance, the only way you’ll make garlic cheese bread from now on. Easy to make, it just needs a little patience as it simmers away in olive oil. You can infuse your olive oil with rosemary, black peppercorns, bay leaves, lemon zest or flakey sea salt for a tantalising taste or keep it simple with some sprigs of thyme. Once the garlic turns golden brown and is soft to the touch, it will lend a caramelised flavour and buttery, velvety texture that will melt in your mouth. This garlic confit will upgrade your cheese and garlic bread and is a delicacy you’ll constantly crave.

Bake 2 cloves of Garlic in Olive oil and herbs

375 F until soft.

I would say its about 15-20 minutes.


Ingredients


  • 1 loaf French or Italian bread (approx. 24" long) 
  • Garlic confit
  • 2 Tbsp olive oil 
  • 4 cloves garlic, minced
  • 2 Tbsp chopped fresh parsley 
  • 1/8 tsp salt 
  • 1/4 tsp garlic powder
  • 1/2 cup Butter, room temperature

Instructions

  • Preheat the oven to 400ºF. In a bowl, stir together the room-temperature butter, olive oil, garlic confit, garlic powder, chopped parsley, and salt until relatively smooth (a few small lumps of butter are okay).
  • Cut the loaf in half, into two 12" long pieces, then cut each piece open lengthwise. Lay the bread on a baking sheet cut sides facing up. Spread the garlic butter mixture evenly over the open surfaces of the bread.*
  • Bake the bread for 10-15 minutes, or until the edges are golden brown and crispy. Bake for less time if you prefer a softer garlic bread, and more time if you prefer a crispier garlic bread. Cut the bread into 2-inch sections and serve hot.


Perfection!!

Enjoy!


Wednesday, January 10, 2024

Arugula Toast


Most days during the week,
I like to make something for. Breakfast for lunch 
Toasts is always my go to.
If we have Arugula its so perfect.


This was pretty easy,
You can spread any spreadable cheese, Cream cheese or mayonnaise
Arugula
and my favorite Soft boiled egg.


Of course, almost forgot
 Chili oil and Siriacha mayo.

Perfection.


What is your favorite toast?


xo


Thursday, November 2, 2023

Cheesy Taco Sticks


Easy meals during the week is my favorite.

These are perfect for School lunch for the kids too,

I sure did packed the leftovers.

It was such a hit.

Let me know what you guys think!


Ingredients

  • 1 lb. ground beef
  • 1 packet taco seasoning mix
  • 1 tube Pillsbury Pizza Dough
  • 5 colby jack and cheddar cheese sticks, halved
  • 4 tbsp butter, melted
  • 1 tsp garlic powder
  • 1 tsp dried parsley


Instructions

  • Preheat oven to 425 degrees F.
  • Lightly coat a large baking sheet with non-stick spray and set aside.
  • Cook the ground beef in a skillet, breaking up with a wooden spoon until fully browned and crumbled. Drain any fat and return skillet to stove top. Mix in the taco seasoning packet (but no water), and stir until fully coated. Remove from heat and let cool to room temperature.*
  • Spread the pizza dough out until it's flat and cut in half lengthwise and then 4 cuts up and down, creating a total of 10 small rectangles. Place about a tablespoon or more of the taco meat in the center of each pizza dough, top with a halved cheese stick and then carefully roll up the pizza stick, making sure to pinch all seams closed.
  • Combine the melted butter, garlic powder and parsley in a small bowl and brush it on the tops of the cheesy taco sticks. Bake for 10 to 12 minutes or until golden brown on top. Serve hot with your favorite taco toppings!


Enjoy!


Sunday, December 25, 2022

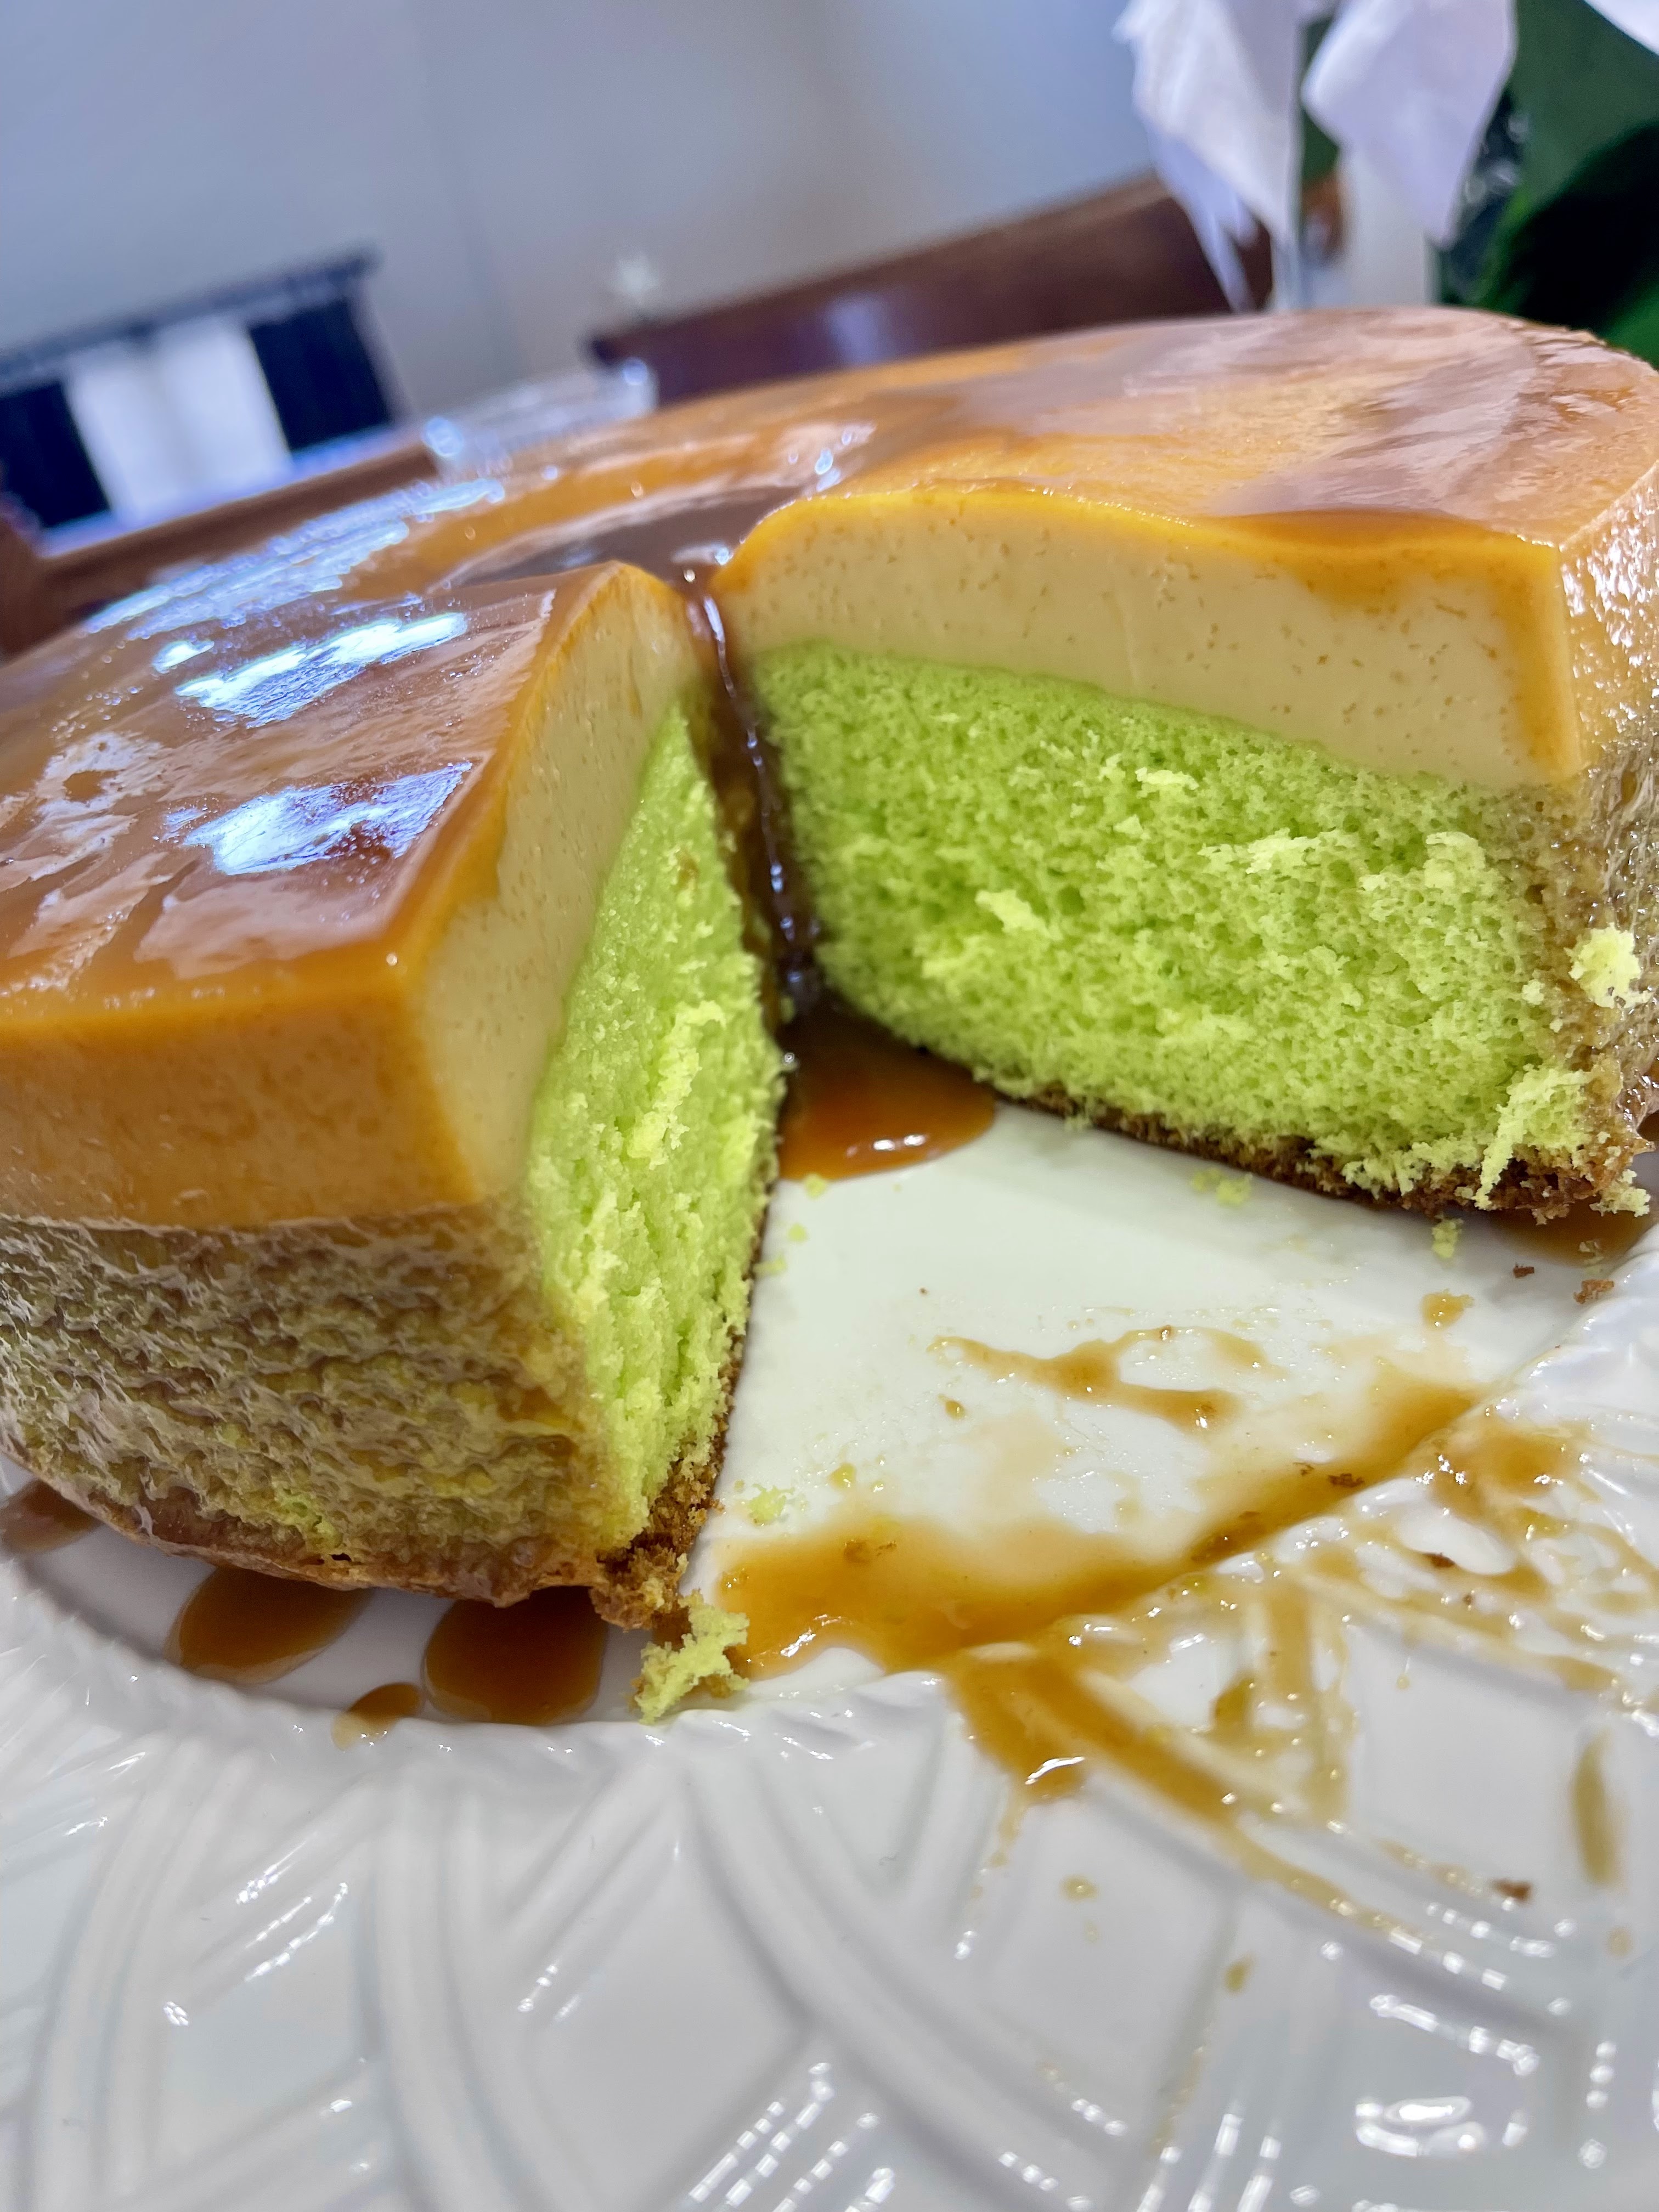
Pandan Custard Cake


For this year's Dessert. 

I made something different. 

I thought the color of this will suit the occasion. 


I used the same recipe of making 

( Ube Flan )

..And it turned out as good!
The only difference I did was I used Pandan Flavoring,
Instead of an Ube!


It is definitely a lot of process making this
And it was so worth it!

Let me know what you guys think!

Enjoy!!!

xo

Sunday, August 7, 2022

Ube Cheese Pandesal


Ohhh Pandesal
The house smells amazing while Baking these.
Nothing else is better.


I remember back then
 going to a Panaderia and smelling the amazing Baked goodies and buying 
some of these was my favorite part of my day.

I feel fortunate to be able to make these myself.
I'm so glad the boys love it
As much as I do.


Recipe here:


I made these so many times and its always perfect
I think its time to make a different kind!
Which one should I make???


Enjoy!!

xo


Friday, August 5, 2022

Pecan Pie Bars


Have I mentioned how much I love anything Pecan?
Pecan Pie, Pecan cookies.
Anything!

I can't believe how easy is this to make!
I definitely ate it all myself!
haha!

Very good for Snack, a little breakfast with your coffee.
Or how ever you prefer!


Ingredients:

  • 1 (8-oz) can refrigerated crescent rolls
  • ¾ cup chopped pecans
  • ½ cup sugar
  • ½ cup light corn syrup
  • 2 Tbsp butter, melted
  • 1 tsp vanilla
  • 1 egg, beaten

Instructions:

  • Preheat oven to 350°F. Lightly spray a 9x13-inch baking dish with cooking spray.
  • Unroll dough and press in bottom and 1/2 inch up sides of a 9x13-inch pan. Firmly press perforations to seal. Bake 8 minutes.
  • Meanwhile, in medium bowl, mix remaining ingredients. Pour filling over partially baked crust.
  • Bake 18 to 22 minutes longer or until golden brown.
  • Cool completely, about 1 hour, and cut into bars.


So so good!


xo


Sunday, July 10, 2022

Blueberry Crescent Ring


Any Blueberry Dessert is my weakness, 

And making any homemade  Blueberry dessert is my favorite

You can't beat homemade.


This was too good I almost ate it all myself! 

haha!

And it was so easy to make.


Let me know what you guys think!


Ingredients

  • 2 containers Pillsbury™ refrigerated crescent dinner rolls

For The Blueberry Filling

  • 2 cups fresh blueberries
  • 1/3 cup sugar
  • 1 tsp lemon juice
  • 7 Tbsp water, divided
  • 3 Tbsp corn starch

For The Cream Cheese Filling

  • 8 oz cream cheese, room temperature
  • 1/3 cup sugar
  • 1 egg yolk
  • 1 tsp lemon juice
  • 1 tsp vanilla

For The Glaze Drizzle

  • 1 cup powdered sugar
  • 2 Tbsp milk

Instructions

  • Preheat oven to 375° 

For The Blueberry Filling

  • In a small saucepan over low heat, add blueberries, sugar, 3 tablespoons water, lemon juice together. Stir and cook for until blueberries have burst, approximately 3-4 minutes.
  • In a small mixing bowl, mix remaining water and corn starch until combined then add to blueberry mixture.
  • Continue stirring until blueberry mixture has thicken. Set aside to cool.

For The Cream Cheese Filling

  • In a medium mixing bowl, beat cream cheese until fluffy, about 2-3 minutes.
  • Add sugar, egg yolk, vanilla, lemon juice and beat for an additional 2 minutes.

For The Pastry Ring

  • Unroll crescent rolls and separate into precut triangles.
  • Place triangles on an ungreased baking sheet so that the wider end of the crescent is in the center forming the circle with about a 5 inch opening in the center and the smaller tip of the crescent is on the outside.
    *When forming the circle, the wider ends of the crescents will overlap each other. 
  • Spread cream cheese mixture over the wide part of the crescents.
  • Spoon blueberry filling on top of cream cheese mixture.
  • Fold the small tip of the crescent over and tuck under the wider part to secure forming the ring.
  • Bake for approximately 20 minutes. Remove from oven, let cool for a few minutes. 

Making The Glaze Drizzle

  • Using a one cup measuring cup, pour powdered sugar and milk together and stir until combined (might need more milk/sugar as desired).
  • Drizzle glaze over pastry ring, once cooled, and cut into desired portions. Enjoy!


Enjoy!

xo

Wednesday, April 13, 2022

Ube Bars


If you guys haven't noticed.

I wanted to learn how to bake because I'm such a bread/pastries girl.

Growing up, I'd rather eat bread than rice!

And when I still lived in the Philippines it makes me happy that I get to buy these at the Bakery 

nearby our house.

Now, I am so so grateful I can make it whenever I want.

It definitely requires some steps for making it.

But, its so worth it!


Let me know what you guys think!


Ingredients

Cake:

  • ¾ cups sugar
  • ½ cup butter softened at room temperature
  • 2 large eggs at room temperature
  • 1 ½ cups all-purpose flour
  • 1 ½ teaspoons baking powder
  • ½ cup milk
  • ¼ teaspoon salt
  • 1 teaspoon vanilla

Ube Glaze :

  • 1 can Ube Condensed Milk 
  • 1/4 cup hot water

Coating:

  • 1-2 cups desiccated coconut

Instructions

  • Preheat your oven to 350° F/180°C. Grease the bottom and sides of an 8-inch (20 cm) square cake pan. Then line the bottom of the pan with parchment paper.
  • In a mixing bowl, cream butter and sugar with an electric mixer until light and fluffy 
  • Add the rest of the cake ingredients and mix at medium speed just until well combined and blended. 
  • Pour the thick batter into the prepared pan and spread evenly. Bake for 30 minutes in the preheated oven or until a toothpick inserted in the center comes out clean.
  • Remove from the oven and let the cake cool in the pan for about 10 minutes before completely removing it from the pan to a cooling rack. Once the cake has cooled down enough, cut the cake into half then into smaller bars.
  • Meanwhile, prepare the glaze. Pour condensed milk in a pan then add water. Bring this to a simmer. Add the ube flavoring and mix just until well blended. Turn the heat off and transfer to a flat, deep plate.
  • Place the desiccated coconut on a plate or wide bowl.
  • Take a piece of the cake bar and roll it with ube glaze. Then dredge it with desiccated coconut to cover completely.
  • Transfer to a serving plate and enjoy


So so good!!!

Enjoy!

xo