Thursday, August 25, 2016

Steak and Asparagus quinoa bowl


I have been so obsessed with quinoa these days. 
I think everyone that is close to me knows how I love rice.
But, I've been trying to eat better. So I decided to try other grains.
I tried Brown rice, Honestly, Brown rice is too dry for me they are okay.
White rice of course is the best. 
But, when I got to try Quinoa I fell in love.

It's so good, and when I found how good it is for you I told myself I will eat it more.

Made this for our meal prep this week.
It was really good!


Steak and Asparagus quinoa bowl

Ingredients:
  • 1 1/2 cups quinoa, uncooked
  • PAM Cooking spray
  • 3/4 pound beef top sirloin steak, cut into bite-sized pieces
  • 1/2 tsp reduced sodium montreal steak seasoning
  • 1/ cup onion, chopped
  • 1/2 cup red bell pepper, chopped
  • 1 lb fresh asparagus
  • 2 tbsp low sodium soy sauce
  • salt and pepper to taste
Directions:
  • Cook quinoa according to package directions. Meanwhile, spray large skillet with cooking spray over medium-high heat.
  • Sprinkle beef with steak seasoning: add to skillet and cook 2-3 minutes. Transfer to a plate.
  • Add onion to the skillet and bell pepper. Cooking for 2-3 minutes or until the pepper is cook according to your preference.
  • Add asparagus, cover and cook 3-4 minutes ( I like mine soft so I cooked it longer.) 
  • Add soy sauce to cooked quinoa and stir gently to combine, Toss quinoa and beef to mixture.
  • Stir and serve!


Enjoy!

Wednesday, August 24, 2016

Spinach and mushroom quinoa.


Happy Hump day friends!
What is your goal for the week?
for the day?
I ask myself that question sometimes.
What should I accomplish for the day. 
or for the week?
It's really good when you are working for something that you really want.
Whatever it is. Long term, or short term.
I hope you find your motivation to do it. 
And..

Never ever give up!


Today's goals.
To eat healthier.
and go for a run.

Best feeling ever when you reach your goal.

If I can do it, you can too!


Anyways, Moving on.

Today's lunch was so good.
So good that I want to eat it again for dinner. :)

Found this recipe online and ever since I tried Quinoa I got obsessed!
Hubby liked it too, that makes me extra happy!

You can add more toppings to this recipe. 
Feel free to change it up with the way you want. 

Enjoy!


Spinach and mushroom quinoa.
Ingredients:
  • 1 lb mushrooms, sliced thinly
  • 3 garlic cloves, minced
  • 1 tbsp unsalted butter
  • 1 tbsp olive oil
  • 5 to 10 ounces fresh spinach
  • 2 cups cooked quinoa
  • salt and pepper

Directions:
  • Heat butter and olive oil in a large skillet over medium high heat. Add mushrooms and garlic and saute over medium-high heat for about 5 minutes until mushrooms are soft. season with salt and pepper
  • Add fresh spinach to the skillet, reduce heat to low, over the skillet with the lid and let mushrooms and spinach cook for about a minute or less ( don't over cook) 
  • Add 2 cups of quinoa to the skillet and cook on low heat for another minute until the quinoa warms up. 
  • Season with salt and pepper.
  • Add another tbsp. of olive oil if desired.


Enjoy!

Monday, August 15, 2016

Open your heart.


"Let today be the day
you open your heart
and let change happen."


Monday, August 8, 2016

Spanish Bread


I have been wanting to make this bread for a long long time. 
After having different kinds of bread here in the U.S. sometimes the simple bread 
is still the best.
 I remember how I love this when
I was a kid, We would eat this for "meryenda" (snack) or breakfast. 
I'm such a bread lover ever since and I don't think that would ever change. 
It's so awesome that I can finally make it whenever I want.


I honestly don't know why this is called spanish bread because there's nothing really so spanish about it.
I guess it's just because of the strong influence of the spaniards to the filipinos in many ways 
especially with food.
This bread is kind of like ( Pandesal (Filipino rolls) ) the only difference is that Spanish bread
has filling. 
Anyway, this is perfect for breakfast and snack! I hope you like it!


Spanish Bread

Ingredients:

For rolls:
  • 3/4 cup milk
  • 1/4 cup unsalted butter
  • 3 1/4 cups bread flour plus more for dusting
  • 1/2 cup sugar
  • 1 tsp salt
  • 1 0.25-oz packet instant dry yeast
  • 2 large eggs
For filling:
  • 1/2 cup butter (softened)
  • 3/4 cup white sugar
  • 1/2 tsp vanilla
  • 1/4 cup breadcrumbs
For dredging:
  • 1/2 cup bradcrumbs
  • 3 Tbsp sugar
Procedure:

1. In the bowl of a stand mixer, combine yeast, 1 1/2 cups flour, sugar and salt. Combine milk and butter in a cup and heat in the microwave to 120° to 130°F. With mixer on low speed, add milk and butter mixture to flour mixture. Add eggs. Beat 3 minutes on medium speed. Gradually add remaining flour and knead with dough hook for 5 to 7 minutes or until smooth and elastic.
2. Place dough in lightly oiled bowl and turn to grease top. Cover with plastic wrap and let rise for 1-2 hrs. or until double in size. Meanwhile, cream butter and sugar in a bowl. Add vanilla and beat until well combined. Set aside. Line two baking sheets with parchment paper.


3. When dough is ready, place it on a floured surface. Divide into four equal pieces. Form each piece into a log and divide again into four equal pieces. Using a rolling pin, roll each piece into a 3"x5" rectangle. Brush the filling into the center and then sprinkle with about a tablespoon of breadcrumbs. Roll from one corner towards the opposite corner. Pinch to seal the edges. Mix breadcrumbs and sugar in a wide bowl then dredge each roll on it, making sure that the rolls are fully coated. Arrange rolls seam down on prepared baking sheets. Cover with plastic wrap or wet cloth and let rise for another 15 minutes.


4. Preheat oven to 350°F. Bake Spanish bread for 20 minutes or until golden brown. Remove from oven. Transfer to wire racks and allow to cool down.


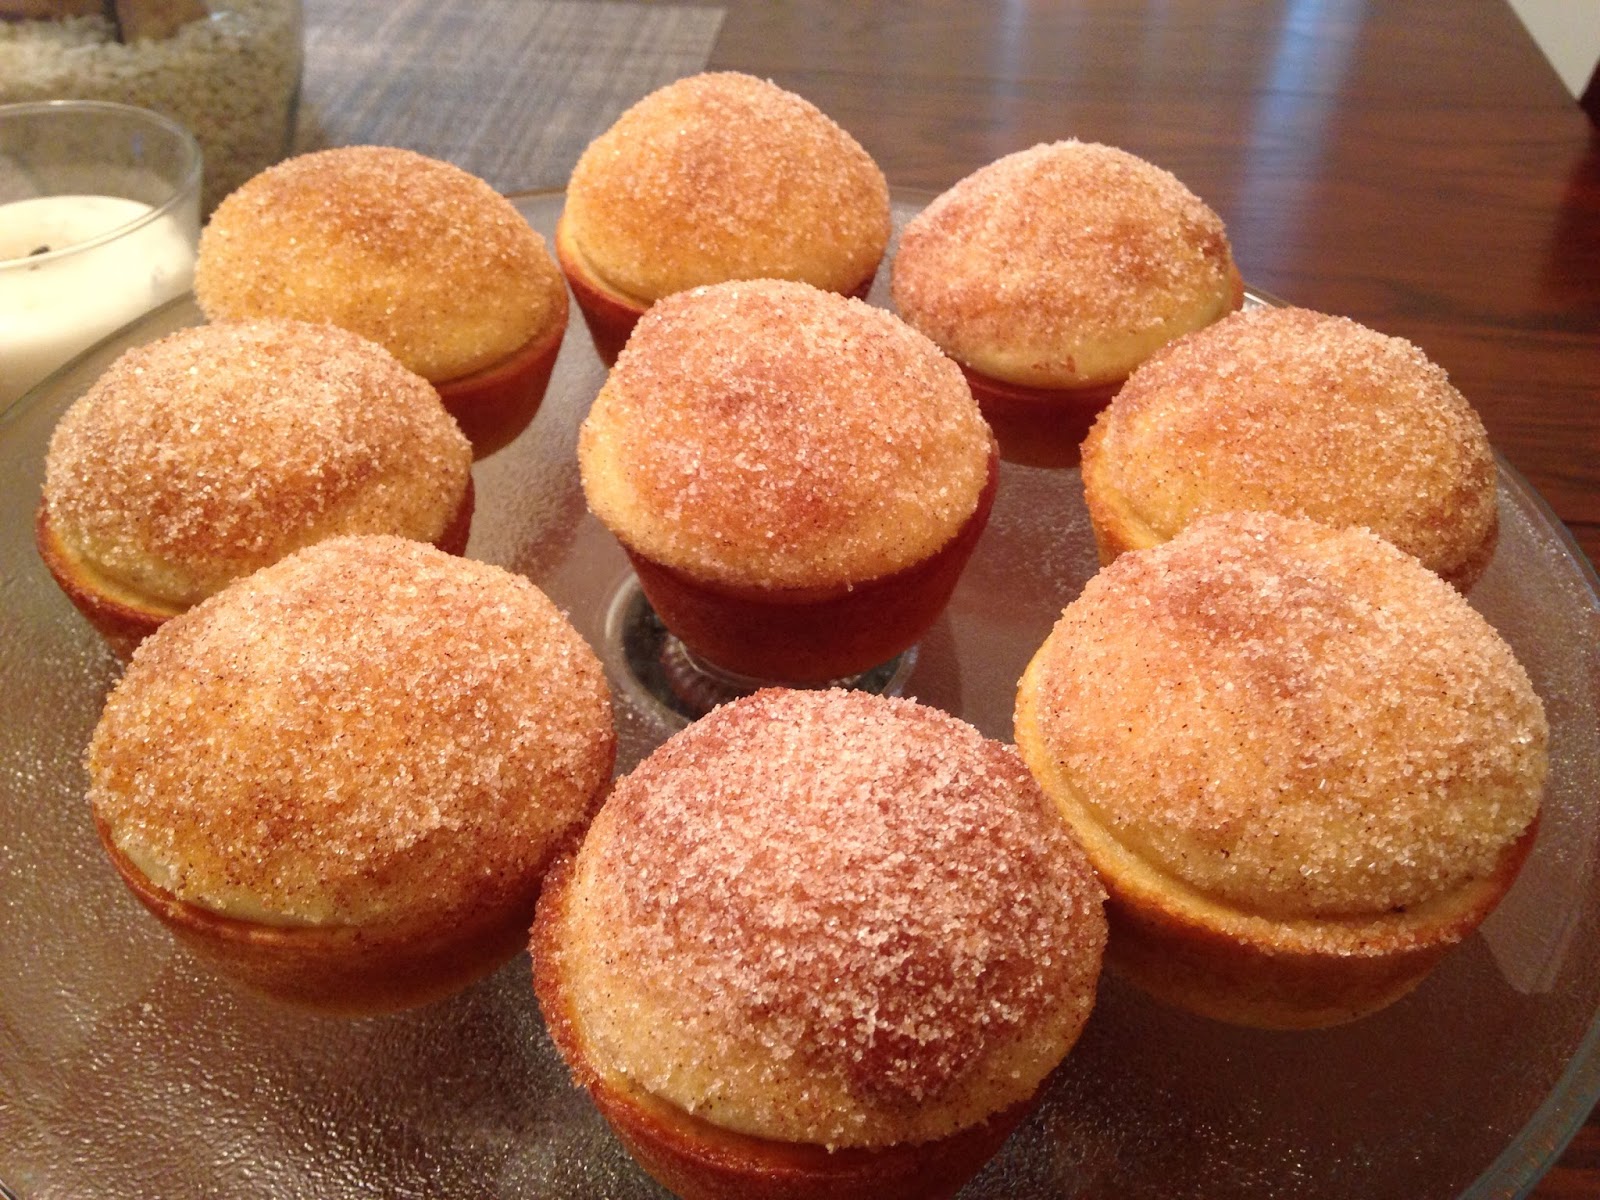
I also made these awesome muffins the other day, It's one of little man's favorite and mine too!
So easy to make.


Tuesday, August 2, 2016

Chicken Cordon Bleu Casserole


As a busy mom. I love finding Recipes that is easy.
Especially something that doesn't need a lot of clean up. 
This casserole dish is perfect. 
..And it's so good!
I swear you will love this. 

Let me know what you think!


Chicken Cordon Bleu Casserole
Ingredients
  1. 4 boneless, skinless chicken breasts, cut in half
  2. 12 slices of thin sliced ham
  3. 1 1/2 cups swiss cheese, shredded
  4. 3 Tbsp. butter, melted
  5. 1 cup of Ritz crackers, crushed
  6. 3 Tbsp. grated parmesan cheese
  7. 1/2 tsp. salt
  8. 1/8 tsp. pepper
For the Sauce
  1. 3 Tbsp. butter
  2. 3 Tbsp. flour
  3. 1 cup milk
  4. 1/2 cup chicken broth
  5. 1/2 Tbsp. Dijon mustard
  6. 1 tsp. Worcestershire sauce
Directions
  1. Preheat the oven to 350 degrees and coat a 9 x 13 baking dish with cooking spray.
  2. Layer the chicken in the bottom of the baking dish. Then, layer with ham slices and the cover with shredded swiss cheese.
  3. In a medium bowl, blend the crushed crackers, grated parmesan, and salt and pepper. Sprinkle the cracker mixture over the cheese to create the next layer.
  4. Pour melted butter over the top of the casserole and bake for 30 to 35 minutes until juices run clear and cracker crust is browned a bit.
  5. To create the sauce, melt the butter in a saucepan slowly. Whisk in the flour and cook for just a couple of minutes. Then slowly pour in the chicken broth and milk. Make sure to continue whisking for about 5 minutes or so as the sauce thickens.
  6. Remove the sauce from the heat and stir in the Dijon, Worcestershire, and a little salt and pepper to taste.
  7. Top each serving of the casserole with the warm creamy sauce.


Enjoy!

xo

Monday, August 1, 2016

Friday, July 29, 2016

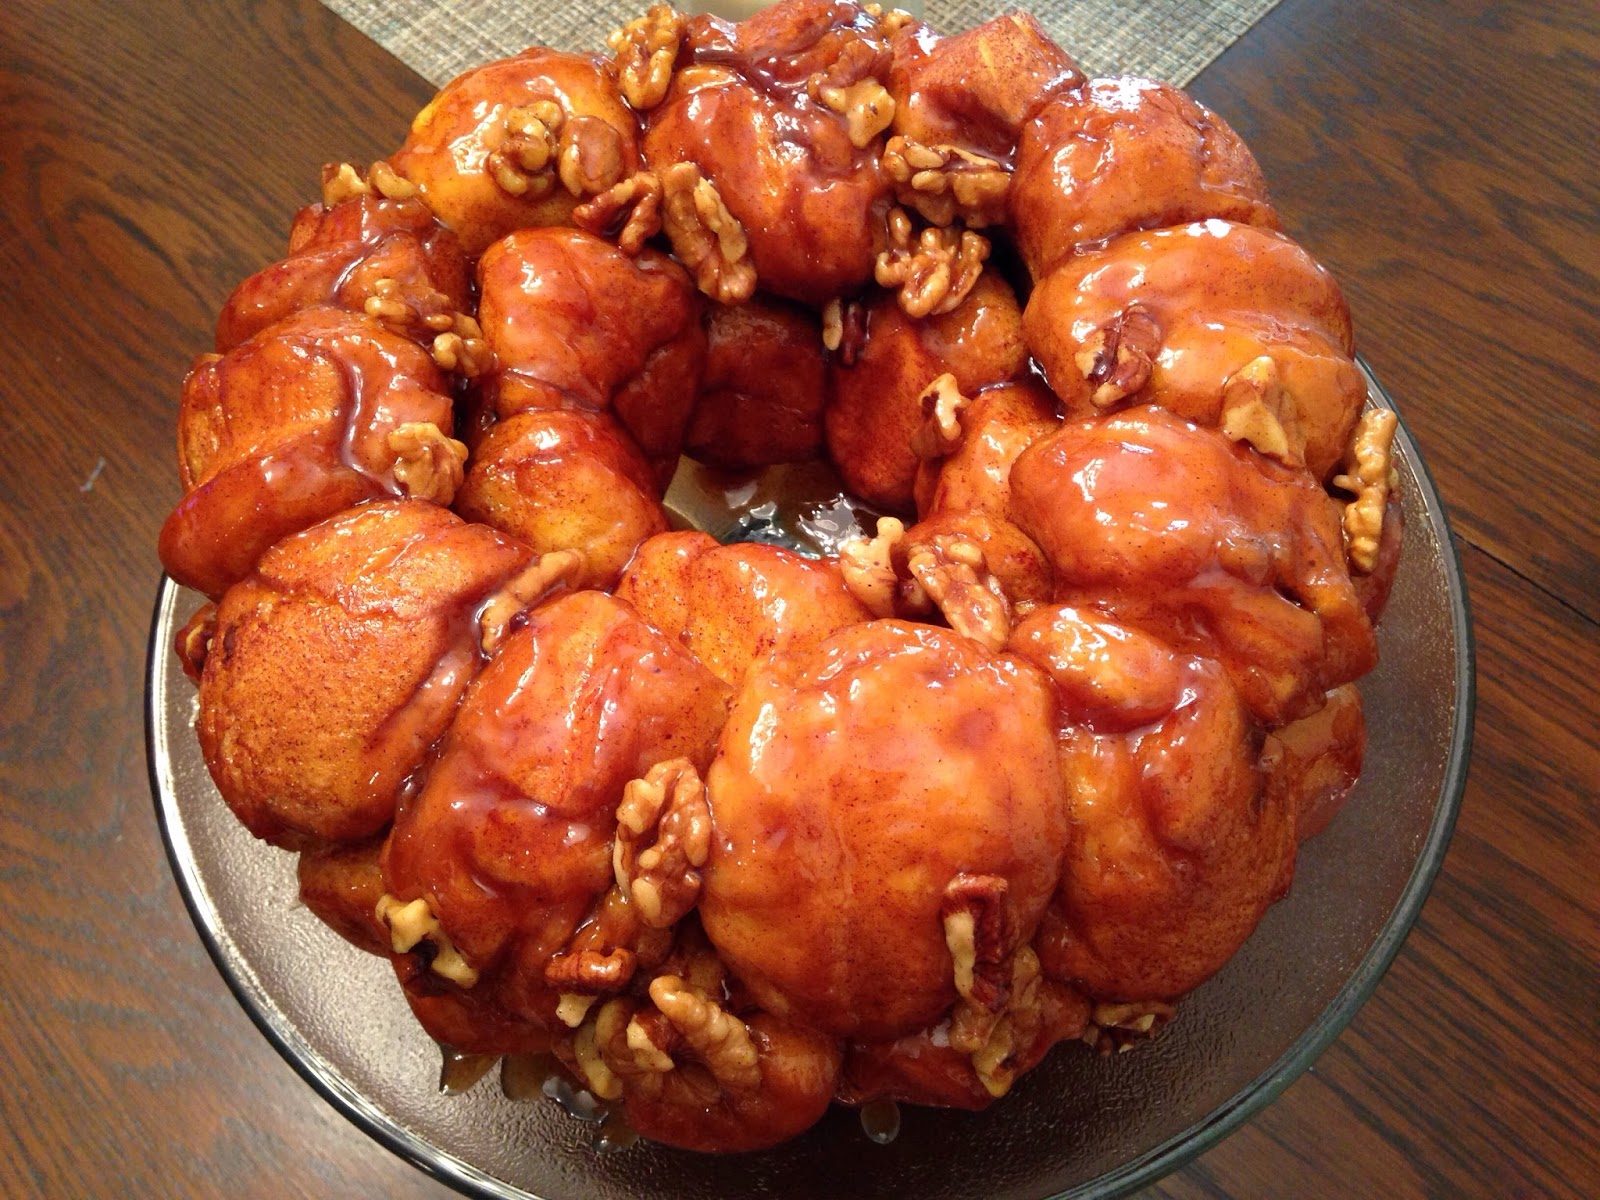
Chocolate Cream Cheese Stuffed Monkey Bread


Had a little extra time this morning to bake!
I was so excited because baking feels like a therapy to me, just like yoga.
There's something about baking that makes me forget about everything.
Just me, in the zone getting creative. 

We've been eating so healthy these days and my craving for carbs and sweet are through
the roof! 
It's okay to have a little bit right?
I swear I didn't eat the whole thing! haha!


Chocolate Cream Cheese Stuffed Monkey Bread


Ingredients:
  • 2 16 oz container biscuit dough
  • 8 oz cream cheese
  • Chocolate chips
  • 1 Cup white sugar
  • 2 tsp cinnamon
  • 1/2 cup butter
  • 1 Cup brown sugar
  • 1/2 cup walnuts (optional)

Directions:

  • Preheat oven to 350 F
  • Cut biscuits in half and cube the cream cheese. Flatten each biscuit and place one cube of cream cheese and a few chocolate chips in the center of each. Fold the biscuit dough around the cream cheese and chocolate and form into a ball.
  • In a gallon plastic bag, combine 1 cup of white sugar and 2 tsp of cinnamon. Add 6-8 dough balls to the bag, seal the bag and shake until well coated. Repeat for the remainder of the stuffed dough pieces.
  • In a microwave safe bowl add 1 cup of brown sugar and 1/2 cup butter. Microwave on high for 70 seconds stopping halfway to stir. Remove from microwave and stir until it reaches a caramel consistency.
  • To a greased Bundt pan sprinkle half of the walnuts, half of the dough pieces, and drizzle half the caramel glaze. Repeat with the remaining walnuts, dough and caramel glaze.

  • Bake in preheated oven for 30-35 minutes. Remove from oven and turn upside down onto a plate to cool for 10 minutes before lifting off the pan (this way  the warm glaze runs back through and fully coats all the bread)

  • Lift off the pan and serve!


Enjoy!


This was so easy to make and so good!
I bet you will like it too!


Someone was so excited to have some!


Wednesday, July 27, 2016

Favorite Healthy eats!


Hi guys, how's your week going?
This week is going fast again even though feels like I'm not really busy.

I recently tried Panera bread. 
I'm so glad they opened one here! because it was really good. 
Their pastries are my favorite but had to try salad and this one was so good!
I had Iced matcha tea latte with it too. 
What's your favorite from panera bread?


I'm still so obsessed with sparkling waters.
These la croix ones was good too, they are not sugary like the Clear brands.
If you want something without sugar you will like this!


These dasani kind ones are the same too, Not sugary.
I can say that I like it better than la croix.


But, on days that I want something that sweet.
I still prefer the Ice sparkling brand.
So refreshing!!
So perfect right now, It's so hot!


Today's lunch was baked salmon with mixed steam veggies.
So simple but so tasty!

Have a good day!!

xo


Monday, July 18, 2016

Protein Blueberry muffins


I love love muffins, I love it that I can eat it everyday!
But, we all know how much calories they have and how much carbs and sugar they have
So, I decided to make a healthy version of it. 
This Protein muffins are so good you can't even tell that it's healthy! 
Perfect when you are on the go and need something to eat. 

Let me know what you think!


Protein Blueberry muffins


Ingredients:

  • Non stick cooking spray
  • 2 cups whole wheat flour
  • 1 cup plain oats, quick or regular
  • 2/3 cup sugar
  • 1 tsp baking powder
  • 1 tsp baking soda
  • 1/2 tsp salt
  • 1 1/2 cup non fat greek yogurt
  • 2 tbsp honey
  • 2 large eggs, lightly beaten
  • 4 tbsp unsalted butter, melted and slightly cooled
  • 1 tsp vanilla extract
  • 1 cup fresh blueberries
Directions:
  • Preheat oven to 350 F
  • Coat muffin tin with cooking spray and set aside
  • In a bowl, combine the flour, oats, sugar, baking powder, baking soda and salt.
  • In a different bowl, combine yogurt, honey, eggs, butter and vanilla
  • Fold the yogurt mixture into the dry mixture and stir to combine well.
  • Gently fold in the blueberries (The mixture should be very thick but if its too thick, or too dry and crumbly, add some milk until mixes well)
  • Spoon the mixture into the muffin tins and bake until the top is golden and it springs back when gently touched, about 20 minutes.


These muffins can be wrapped in plastic and store in the freezer.

Enjoy!

xo


Monday, July 11, 2016

Healthy eats!


Hello everyone! 
I finally had a chance to write something, It's definitely been a while.
Little man is almost two months old now.
I have been quite busy or I'm too tired to get online and do something.
But, I'm so glad that eventhough I'm pretty busy with kids and other stuff
our healthy eating has been on point!
I figure I should share this with all of you guys.

I'm not really trying to lose more weight, I just want to make sure 
that I'm eating good for breastfeeding.
But, just like what they said don't focus on getting skinny!
Just eat healthy and your body will just get rid of the unwanted weight by itself.
I got a little bit more to lose before I get back to my pre-pregnancy weight.
I don't really care, I've been tired but feeling I'm great and that's what matters!


I'm back on doing meal prepping again and I swear it's really helpful especially 
that I don't have much time to cook anymore. 
I started making the meals I have been making before.
Recipes here ( Sunday Meal prep )
I found some recipes I want to try and I will definitely share it with all of you.


This meal that I made last weekend was Baked chicken with roasted potatoes, asparagus and 
steam broccoli. 
It's really simple. 
I will post detailed recipe of it soon! 


2 Ingredient Pancake

Okay, So I tried this 2 ingredients pancakes that I've been seeing on Pinterest.
I'm not sure If I did something wrong.
It's basically made with bananas and eggs.
I added cinnamon and vanilla but, they are a too runny, maybe that's what it suppose to be
but, It was just really hard to cook. It was good though!
I need to try to add oats next time. 
I still recommend it though, Just make sure you cook it on low. 


Lactation Smoothie

I'm also been having Lactation smoothie once in a while now and I say it's pretty good
I always drink smoothie before and  I definitely love love it.
This one is made with frozen bananas, frozen strawberries, quick oats greek yogurt, and flax seed.

Going to try lactation cookies next time! 

More healthy eats I want to share with all of you guys.
I hope you all like it!

Happy weekend and stay cool! 
It's been crazy hot!


xoxo
-Jen


Saturday, July 2, 2016

Journey


"Maybe the journey isn't so much about 
becoming anything.
Maybe it's about unbecoming everything that
isn't really you,
so you can be who you were meant 
to be in the first place."

Wednesday, June 15, 2016

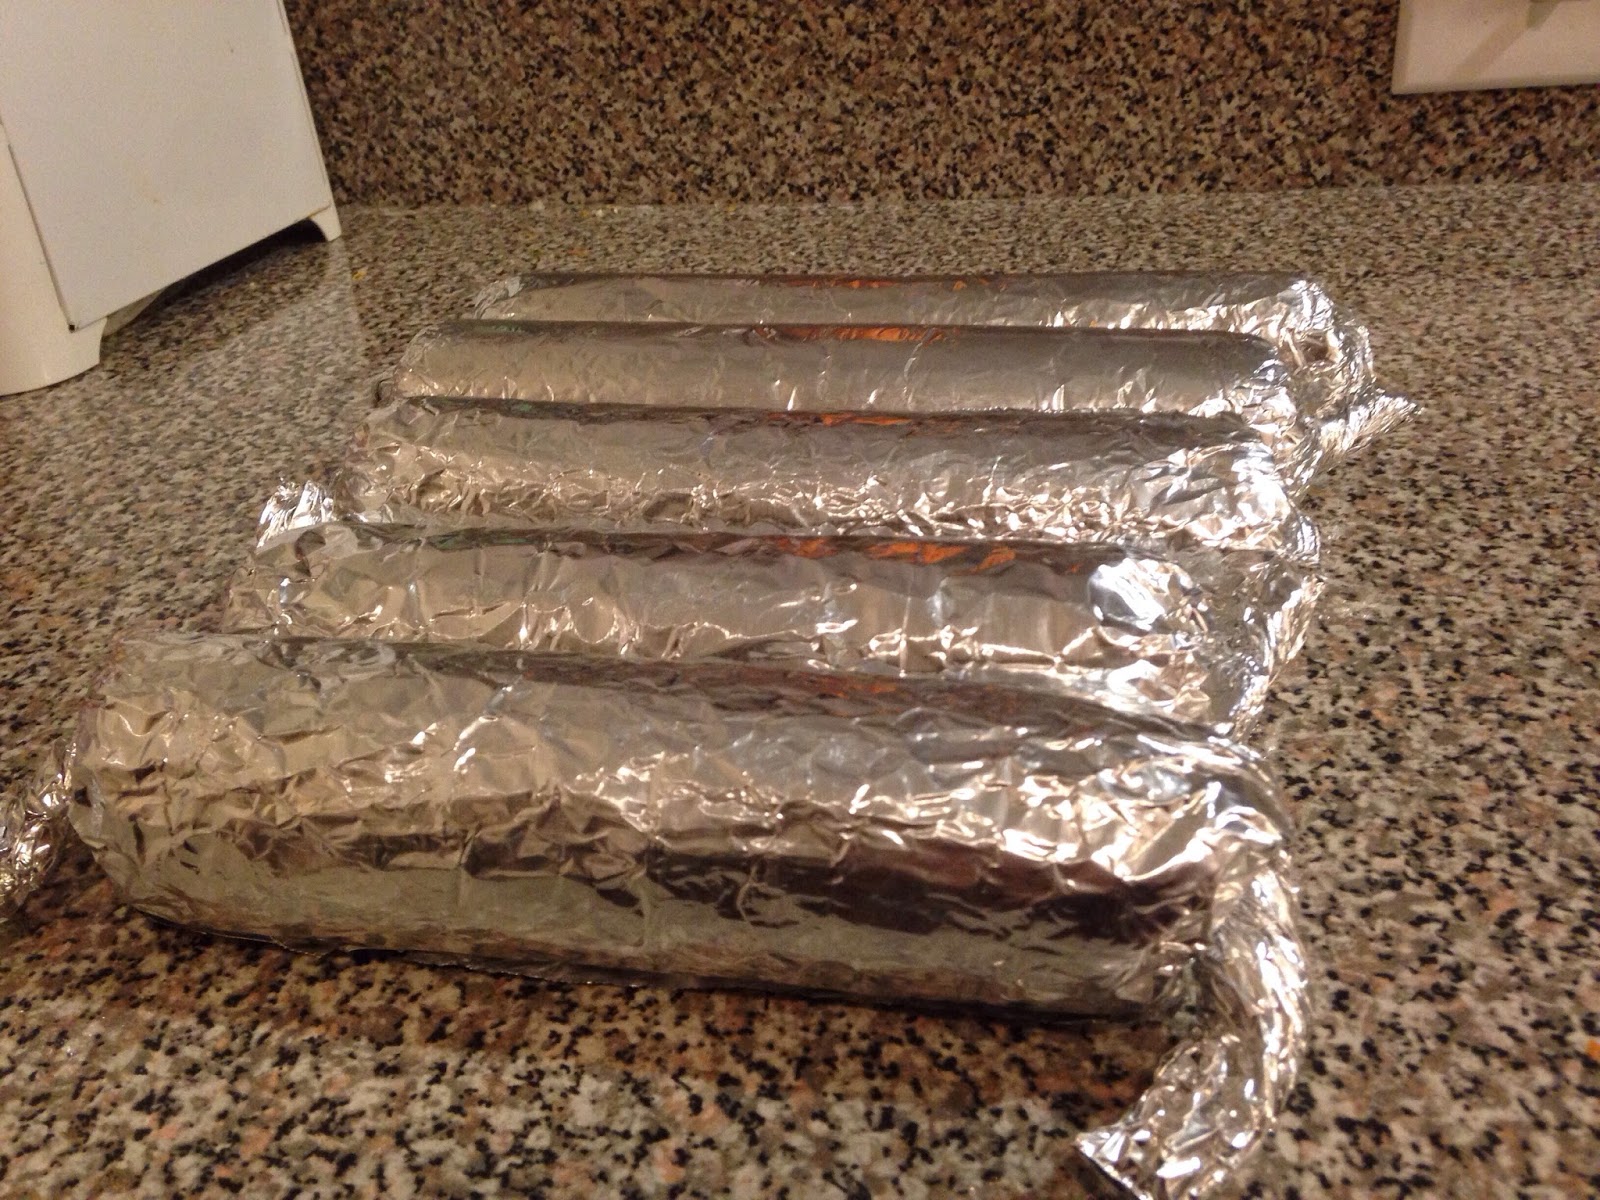
Embotido (Filipino meatloaf)


Embotido 


Steamer has been my favorite thing to use in the kitchen these days.
There's just so many Food, especially Filipino food that I miss and I want to cook!

One of them is this one. 
It's a Filipino version of Meatloaf. 
It's just one of the best Meatloaf version I've ever had. 

Let me know what you guys think!


Ingredients:

  • 1 lb Ground pork
  • 1/4 Cup garlic,minced
  • 1/2 Cup onion, minced
  • 1/4 Cup carrots,minced
  • 1/2 Cup red bell pepper, minced
  • 1/2 Cup green bell pepper, minced
  • 1 Tbsp sweet pickle relish
  • 2 Tbsp raisins
  • 1 pc. chorizo, finely chopped
  • 1/4 Cup grated cheese
  • 2 Tbsp. liver spread
  • 1 egg beaten 
  • 1 Tbsp soy sauce 
  • 1 Tbsp oyster sauce
  • 1 Tbsp Filipino ketchup
  • 1 Tbsp all purpose flour
  • 2 Tbsp Bread crumbs
  • 2 slices whole wheat bread, flaked and soaked in 1/4 Cup evaporated milk.
  • 2 Tsp salt 
  • 1 Tsp pepper

For Filling:
         
        3 Eggs, hard boiled & quartered
        3 Beef franks, halved lengthwise

Procedure:

  • In a bowl, season ground pork with salt and pper.
  • Add the garlic, onion, carrots, bell peppers, pickle relish, raisins, chorizo, cheddar cheese, liver spread, soy sayce, oyster sauce and ketchup. mix well.
  • Add the bread and milk mixture, bread crumbs, flour and the beaten egg, mix thoroughly.
  • On a slightly greased sheet of aluminum foil, place a cup of meat mixture and flatten it, leacing about 3 inches of space on both ends of the foil.

  • Put the sliced beef franks and sliced boiled eggs on the middle of the meat mixture.
  • Roll the foil to foam a log locking the sausage and egg in the middle. Lock the foil by twisting both ends.

  • Oven medium heat, cook in a steamer for 1 hour.
  • Remove from the steamer and allow to cool down. Refrigerate until ready to serve.
  • Unwrap and slice. Serve with hot rice and your choice of dip.


Enjoy, and have a great week!!!

xo
-Jen


Monday, June 13, 2016

Chocoflan


Hello everyone!
How is your weekend so far??
So my In-laws are visiting tomorrow.
I find it a good reason to bake something special!
I have been wanting to make this for a while now and I'm so glad I got to make it.

I was so worried that It won't turn out good. 
..And with how busy I am these days, I'm so glad to have time to bake today.
This was actually not that hard.
As long as you have all of the ingredients and you follow the instructions it will
turn out really good!


Chocoflan

Ingredients:
For the Cake:
  • 10 Tbsp butter, room temperature
  • 1 Cup sugar
  • 1 Egg
  • 1/4 tsp Baking powder
  • 3/4 tsp cocoa powder
  • 1/4 tsp salt
  • 1 1/4 Cup buttermilk
  • butter or baking spray for greasing
  • 1/2 cup or more caramel topping
For the Flan:
  • 1 12 oz can of evaporated milk
  • 1 12 oz can condensed milk
  • 4 oz cream cheese, room temperature
  • 3 eggs
  • 1 Tbsp vanilla extract
Directions:
 
  • Preheat oven to 350 F
  • Grease a 12-cup bundt pan with butter or baking spray. Pour 1/4 cup of caramel at the bottom of the pan. If the caramel is too thick, warm it up so it will settle evenly on the bottom of the pan.
  • Cream the butter and sugar together. Add the egg and beat until light and fluffy.
  • Sift the flour, baking powder, baking soda, cocoa powder and salt in a separate mixing bowl.
  • Beat the 1/3 of the flour mixture and half of the buttermilk into the egg mixture. Repeat, ending with the last of the flour mixture. Blend well.
  • Spoon the cake batter into the pan.  Carefully drag a fork on the top to even it out without disturbing the caramel at the bottom.
  • Mix all of the ingredients of the flan together and blend in a blender or with a hand blender.
  • Slowly pour the flan mixture into the cake batter.
  • Cover with a foil.
  • Sit the bundt pan on a roasting tin and add about an inch of the hot water.
  • Bake for an hour and half or until ta cake tester comes out clean. The cake layer should rise to the top.
  • Remove from water bath and cool to room temperature about 1 hour.
  • Remove the pan and scrape any remaining caramel onto the cake. Arrange pecans on top and drizzle with more caramel.
  • Slice and serve with caramel sauce.

Enjoy!!!


Sunday, June 5, 2016

Grateful


I can't believe its been 2 weeks since my baby was born.
..and it has been a wonderful 2 weeks.
Busy, trying to figure out how to do this "mom of 2" thing.
So grateful that my hubby never left my side and helping me
with everything.

So many things I want to stay that I don't even know where to start.
But for now, I can say that I'm really happy, grateful.
So excited for our next journey.

xo

Tuesday, May 31, 2016

Banana Chocolate Coconut Bites


Hello everyone!
It's been a while since I updated.
Well,first of all. My Baby is here!!!
It's been a wonderful 2 weeks.

I'll share more about it on my next post.
Anyways, I am breastfeeding like with my first born.
And, I totally forgot how breastfeeding makes me constantly hungry!
I keep on eating whatever I see and that's not good!
I decided to start making healthy snacks so even when I'm hungry late at night
What I'm going to grab is healthy!
I decided to make these and It was so good!
No bake, Eat clean dessert/snack

Let me know what you guys think!

Banana Chocolate Coconut Bites


Ingredients:

1 cup coconut flakes
1 banana
1 avocado
1 tsp cinnamon
2 tbsp cocoa powder
2 tbsp honey

Directions:
Mash banana and avocado with a fork until well blended. 
Add in cinnamon, cocoa, and honey.
Add in coconut shreds and stir until batter thickens.
Roll into little balls and roll in coconut shreds.
Store in the fridge and enjoy!